How to Position Your Hands for CPR: Adult, Child, and Infant Guide

Cardiac arrest is among the leading cause of death in the United States and worldwide. This life-threatening emergency occurs when the heart loses its ability to pump blood through the body due to an inadequate or absent heartbeat. Sudden cardiac arrest (SCA), the most dramatic occurrence of cardiac arrest, can happen with little to no warning at all.
Therefore, it’s crucial for the general public to have a basic understanding of how to respond during a cardiac arrest emergency — either through formal CPR training or by knowing compression-only CPR (sometimes called hands-only CPR).
In the chaos of an emergency, even trained bystanders can hesitate or question if they have the correct hand placement for chest compressions, especially when providing care to young children or infants.
As we highlight the importance of CPR and AED training during Sudden Cardiac Arrest Awareness Month — as well as year-round — let’s review how to position your hands for CPR.
The Importance of High-Quality Chest Compressions
High-quality cardiopulmonary resuscitation (CPR) is the primary influence on survival from cardiac arrest. It helps keep the brain and other vital organs alive by pushing oxygen-rich blood throughout the body via external compressions and rescue breathing.
High-quality chest compressions are the foundation of high-quality CPR. External compression of the chest increases pressure inside the chest and directly compresses the heart, forcing blood to move from the chest to the lungs, heart, brain, and the rest of the body.
Therefore, regularly reviewing and practicing proper hand placement can significantly improve the quality of chest compressions during an emergency situation.
CPR Hand Placement for Adults
For an adult cardiac arrest victim, follow these chest compression steps to ensure you are positioned correctly:
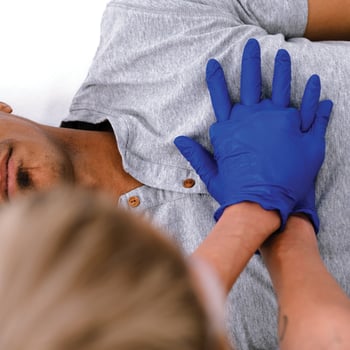
Position yourself at the person’s side, kneeling close to one side of the chest.
- Place the heel of your hand in the center of the chest, on the lower half of the breastbone.
- Place the heel of the other hand directly on top of the first hand.
- Lift or interlock your fingers to keep them off the chest.
- Position your shoulders directly above your hands and straighten your arms to lock your elbows.
- Push hard and deep, straight down, using your upper body weight to compress the chest at least two inches.
- Push fast at a compression rate of 100-120 compressions per minute.
After each compression, allow the chest to fully rise by lifting your weight off the person’s chest. Avoid lifting your hands completely off the chest, but don’t lean on the chest between compressions.
Push hard and fast until you see obvious signs of life or until emergency help arrives and takes over.
CPR Hand Position for Children and Infants
While the overall goal of chest compressions is the same for children and infants, there are a few key differences to note when performing CPR on a child versus an infant.
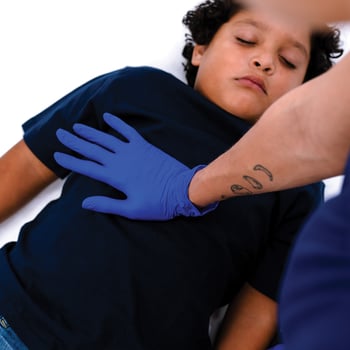
For children ages one-year to puberty, continue to position your hands in the center of their chest. Use one or two hands for compressions, depending on the size of the child. If you become fatigued during compressions, use both hands to ensure you continue to reach the desired depth of at least two inches.
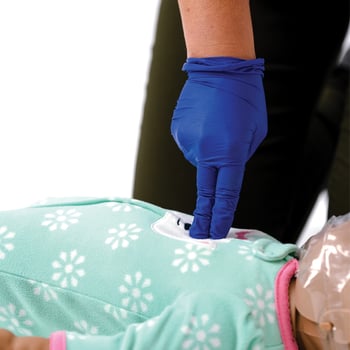
For children younger than one year, position two fingers in the center of the chest just below the nipple line. Alternatively, you can use a two-thumb encircling-hands technique or use the heel of one hand on the lower half of the breastbone. Aim for a compression depth of about 1.5 inches or 1/3 the depth of the infant’s chest.
Allow complete chest recoil between compressions and minimize interruptions. Aim for a compression rate of 100-120 compressions per minute.
An Overview of Adult, Child, and Infant Hand Position for CPR
Whether performing traditional CPR with rescue breaths or providing compression-only CPR, it’s important to feel confident in your hand placement.
Let’s recap how to position your hands for CPR:
Action | Adult | Child | Infant |
Compression Technique | 2 Hands | 1 or 2 Hands | 2 Fingers, 2-Thumb Encircling-Hands, Heel of One Hand |
Compression Location | Center of chest, on the lower half of the breastbone | Center of chest, just below nipple line if using 2 fingers Center of chest, on the lower half of the breastbone for alternative techniques | |
Push Hard | At least 2 inches | At least 2 inches | About 1.5 inches |
Push Fast | 100-120 compressions per minute | ||
This simple guide can be added to first aid kits or displayed in public view for quick reference.
CPR Alone Isn't Enough During SCA
Although CPR is the immediate treatment for suspected sudden cardiac arrest, it isn’t enough on its own.
The most effective and best way to treat SCA is through a combination of early CPR and early defibrillation using an automated external defibrillator (AED). In fact, high-quality CPR and early AED use can more than double the likelihood of survival of SCA.
When needed, an AED will deliver an electrical shock to restore the heart’s normal contractions, allowing the heart to effectively pump blood.
As a result, the person might return to normal breathing, moving, or reacting in other ways. Alternatively, the AED might direct you to continue giving high-quality chest compressions before analyzing and providing additional shocks.
Untrained Bystanders Can Use an AED
Already feeling some hesitation just reading about electrical shocks from an AED? Fortunately, AEDs are simple to operate even for untrained responders. They are designed to be user-friendly and will only deliver a shock when necessary — meaning the person might not live without it.
Once you turn on the AED, voice prompts and visual images will guide you through how to apply the AED pads, analyze the heart rhythm, and deliver a shock if necessary.
Why is CPR and AED Training Needed?
CPR, AED, and First Aid training allows students to practice lifesaving techniques in class while receiving feedback from an authorized instructor. This helps instill confidence and increases the likelihood of a bystander providing high-quality compressions during a cardiac arrest emergency.
You’ll also be introduced to a wide range of medical emergency topics that are presented in a digestible way.
HSI CPR classes are designed to deliver information in multiple ways (e.g. video, lecture, workbook, demonstration, skills practice, etc.) to increase retention and allow instructors to “meet students where they are” in terms of learning styles and needs.
For instance, simply reading that you should compress the chest at least two inches might make sense for some. But for many people, they need to see what “two inches” looks and feels like in person. They need to physically understand what it’s like for their own body to maintain a compression rate of 100-120 compressions per minute.
Most CPR students learn very quickly that compressions are more exhausting, especially when under duress, than first assumed when reading text or watching a video. Therefore, a CPR and AED class can more adequately prepare them to react quickly in an emergency through real-life scenario simulations and practice.
CPR Training Can Save the Life of a Loved One
Most out-of-hospital cardiac arrest emergencies happen at home. Therefore, you’re most likely to use your CPR and AED training to help a family member or loved one by providing care while you wait for EMS to arrive.
That being said, many people are called into action to save the life of a stranger. In fact, we regularly post about these everyday heroes on our social media to help highlight the importance of learning CPR.
If you’re interested in CPR certification, we encourage you to contact your local Training Center to practice your compression technique and receive lifesaving training that can be used at home, in the workplace, and in your community.
Related Articles
4 CPR Feedback Devices That Improve Student Performance
CPR feedback devices can provide valuable audio & visual feedback for the rate & depth of compressions while training to improve student performance.
Emergency Care

Top 12 Myths About Sudden Cardiac Arrest
For SCA Awareness Month, let’s debunk the top 12 myths about sudden cardiac arrest to help raise awareness and increase the chance of survival.
Emergency Care

HSI Has All Your Emergency Care Training Needs
HSI has grown to be a full-service provider for all your emergency care training needs, including product support and business management resources.
Emergency Care
